STAY INFORMED
following content serves as a personal note and may lack complete accuracy or
certainty.
Minimal-Mistakes instruction
Useful vscode Shortcut Keys
Git Note
Building a Jekyll Blog Website
Introduction
Jekyll is a static site generator that allows you to create simple, fast, and secure websites using Markdown, Liquid templates, and other technologies. It’s commonly used for blogs, personal websites, and project documentation.
There are various Jekyll themes available, and you can also create your own custom themes based on your specific design preferences and requirements. I am using Minimal-Mistakes theme and I will post how to create a blog website.
step-by-step
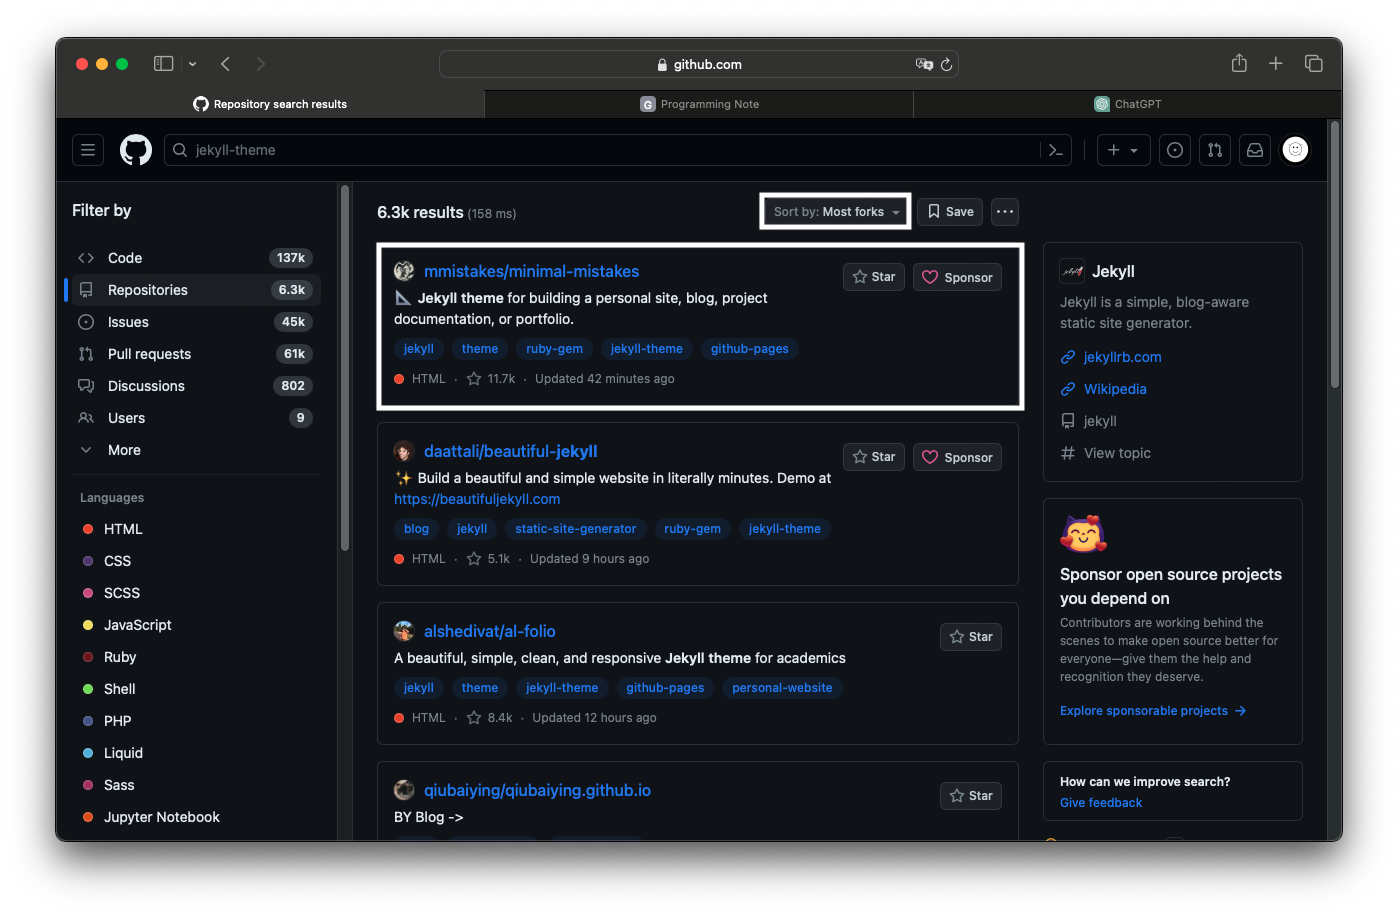
Go to github and search ‘jekyll-theme’.

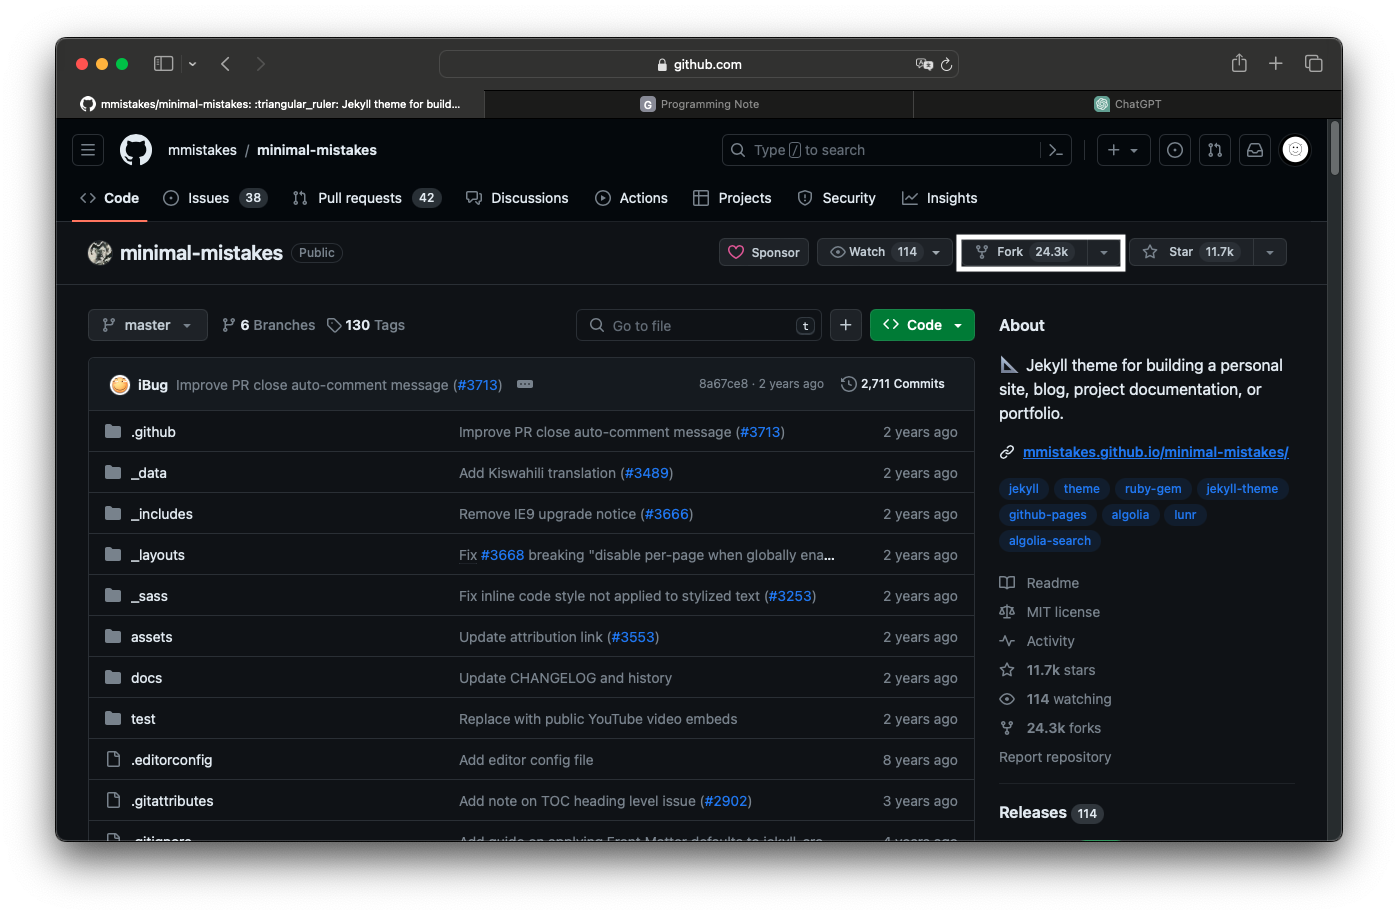
Then you will see a lot of themes. If you want to use another theme, that is totally fine, but I will fork minimal-mistakes. You better switch sort by to Most forks then you see it at the top.
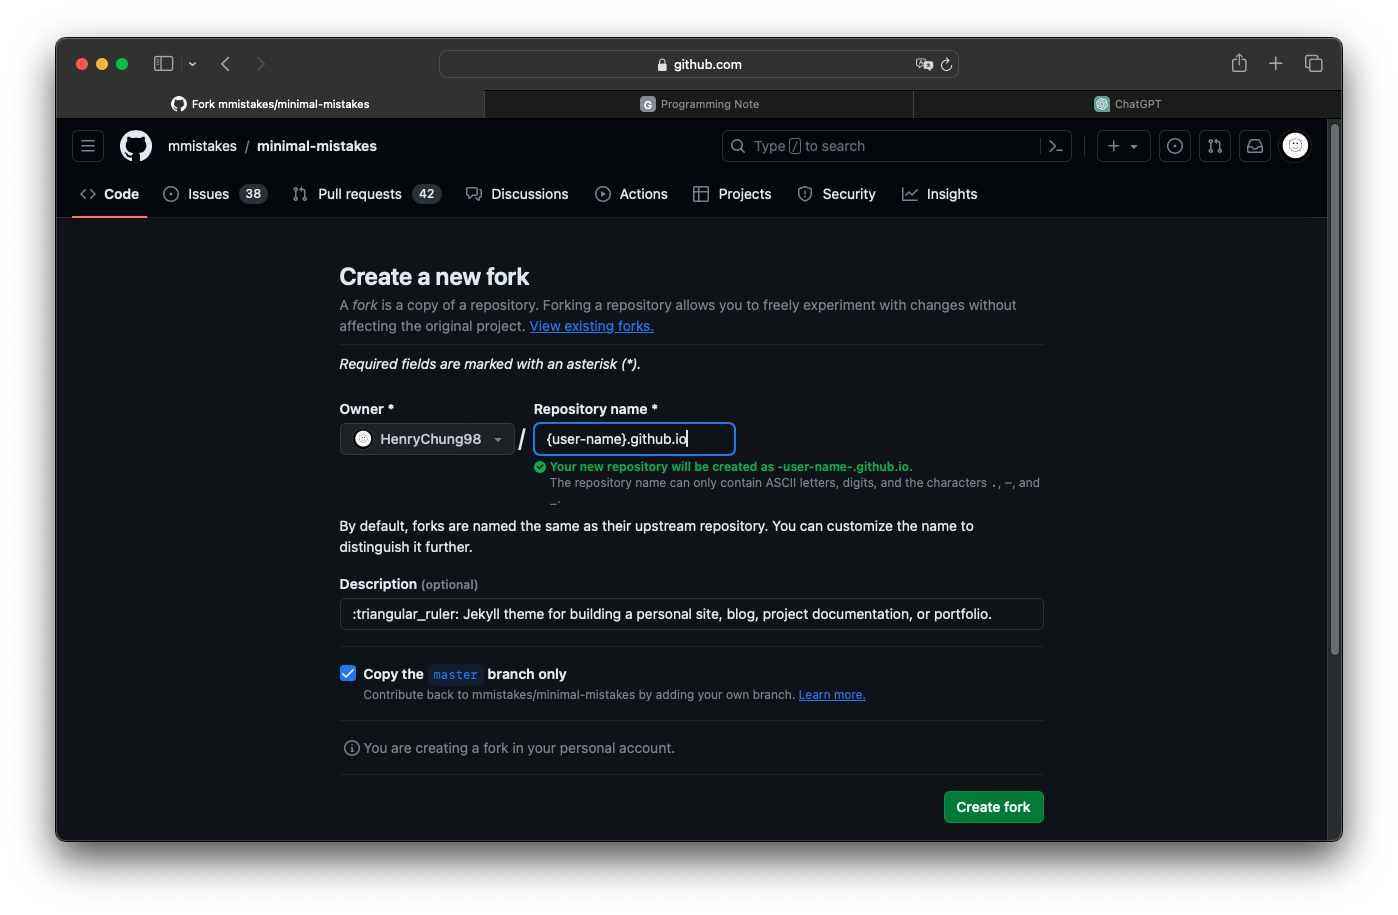
All you need to do is fork it and rename it to {user-name}.github.io.
Lastly, go to the repository and find _config.yml file. Then click ‘Edit this file’ and edit the url to your repository name.
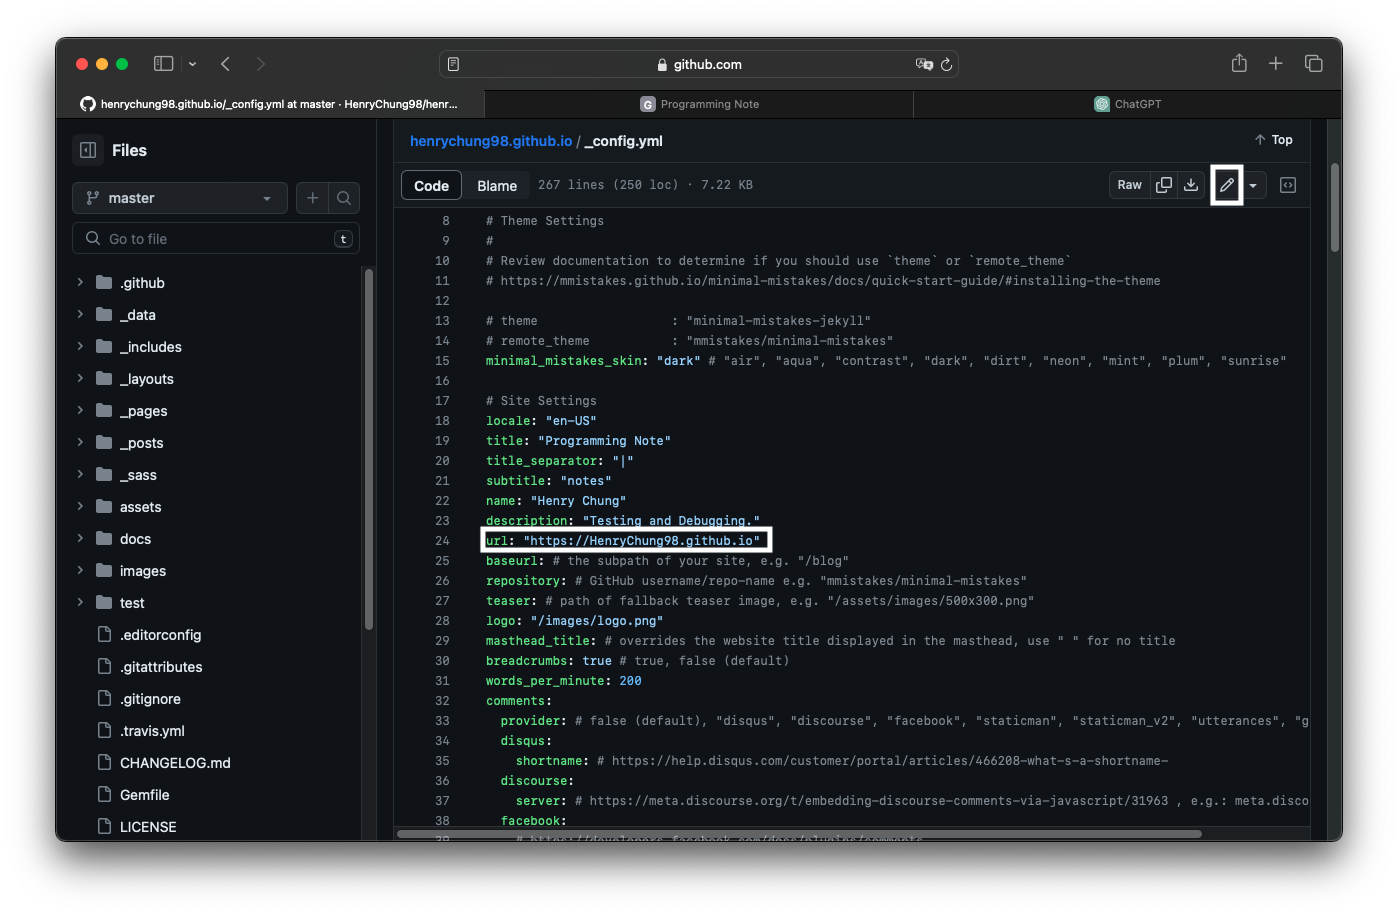
If you follow these guidelines, your blog website is automatically deployed. Your blog website url will be ‘{user-name}.github.io’.
I already changed the default setting like you see the screenshot, so you also can change those whatever you want.